Sunday, December 9, 2012

Celebrating Christmas!

Last week we celebrated the Christmas season by making elves, trees and santas! We read the book New and Improved Santa. In this book, Santa wants to change the way he looks so he dyes his hair and switches his outfits. The kids got to choose want kind of a Santa they wanted to make. They have great imaginations!

     Beach Santa                   King Santa              Mailman Santa         Star Wars Santa

abi santa  addison santa  evan santa  harper santa

       Silly Santa              Christmas Santa         Rocker Santa           Rock N Roll Santa

karston santa  keegan santa  libby santa  luther santa

       Mrs. Santa            Motorcycle Santa            Baby Santa             Groovy Santa

makinzi santa max santa  philip santa reese santa

We also decorated our own Christmas trees and played “I Spy” with the ornaments on our tree.

trees  trees 2  trees 3

I hope you all got to see the concert on Thursday! They did a wonderful job! Here they are dressed up ready to sing!

class picture

Monday, December 3, 2012

You Can’t Catch Me, I’m the Gingerbread Man!

Last week we painted gingerbread people and gingerbread houses. We labeled the parts on the gingerbread man and we did some fun writings about the different gingerbread stories we read about. There are so many versions of the story! We had fun reading the different types and comparing the characters, refrain and ending.

Have fun looking through these pictures of our gingerbread week!

                          gb labeling     gb labeling 2

   gingerbread house gingerbread house romeo makinzi jd gb house

                 gb house  gb house 2

    gb boy      gb boy 2       If I were a Gingerbrad girl

gingerbread men

gingerbread close up 2  gingerbread close up

Wednesday, November 21, 2012

Learning About the Native Americans

We enjoyed learning a lot about the Native Americans last week. We made canoes, tipis, native american clothing and a totem pole!!! We had so much fun making out totem pole Tuesday morning. The kids brainstormed which animals they thought were the MOST important to the Native American people. After we had our list of animals each person got to vote on which one they would like to help create. The groups were split evenly and we went to work! I LOVE the way it turned out!!! It will be sitting outside our classroom for a long time! 

Here we are making our Native American clothing..


And the finished product!! We got to wear these costumes down to lunch one day to have a feast! (Chicken nuggets.. ;) )


Here is the buffalo group! They added lots of string and tissue paper to make it look hairy...awesome!! The buffalo are important to the Native Americans because they used their skin to make clothing.


Fish are important to the Native Americans because it was one of their food sources! I never would have thought of that! They are such smarties! This group used lots of colorful tissue paper and sparkly sequins for the scales. So cool.


These girls thought the horse was important to the Native Americans because they rode them to get from place to place, to hunt and to sell goods. I love the string the added for the horses mane!


The eagle is usually always at the top of a totem pole. This group got to make our eagle head and wings and did a GREAT job! They were so creative.


Here is the turtle group! We decided turtles were important to Native Americans because they used their shells as shields and turned them into bowls to eat out of. What great imaginations. :) This group worked hard gluing construction paper and tissue paper to make the shell look real. 


And here is our finished totem pole!!!!!! I am one proud teacher. 


I hope you all have a Happy Thanksgiving!!! I am so thankful for such a great class and great parents who are supportive and helpful. Enjoy your time with these little guys at home. I will be excited to see them when we get back to school! 


Tuesday, November 20, 2012

How to Catch a Turkey!

In Writer’s Workshop we have been writing “How To” stories. In a “How To” writing we first think of something we know how to do. Then we think of the steps it takes to do it. When we have the idea we draw three separate pictures to show all of the steps and then add words! They have come up with some great ideas and they are becoming wonderful writers! Since we have been talking a lot about turkeys we brainstormed a class “How To” called “How to Catch a Turkey.”

how to catch a turkey


We came up with some ideas together about how we could catch a turkey. They got to choose which one they wanted to write about. Here are some of our writings!


how to catch a turkey evan   


First put the trap up.


Next the turkey got in the trap.


Last I bring the turkey home.


how to catch a turkey cooper 

First put the trap up.


Next trap the turkey.


Last the trap got the turkey.

how to catch a turkey reese 

First put up the trap.


Next put the turkey in the cage.


Last put the turkey in the house.


Owls

We finished Owls a week and a half ago and I am just now posting about it! Sorry! Here is a quick re-cap of what we did during our owl study.

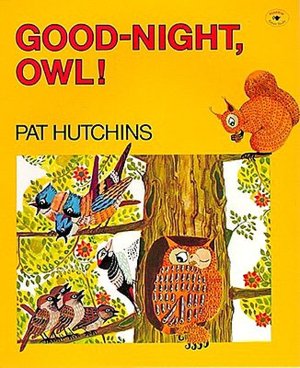
We introduced owls by reading Good-Night Owl by Pat Hutchins. This story had

lots of colorful illustrations and we learned that owls sleep during the day and are awake at night. This is called nocturnal. We made our own owls with fun scrapbook paper. We made sure to include big eyes to remember owls have good eye sight.


Owls  owl scrapbook  owl 2

We did a guided drawing with these owls and then used water colors to paint them. A guided drawing means I drew the owl step by step and they had to listen and watch my directions and copy it onto their paper. It definitely makes them focus! They did a great job!

close up owl painting Owl Painting

We talked about four types of Owls during our unit. We made a class chart of each owl with what they ate, where they lived, how tall they were and how long their wings were. It was a good way for us to compare the owls and see how they were the same and how they were different.

Here are our Snowy Owls:

 snowy owl  snowy owl 1

Our Great Horned Owls:

Great Horned Owl Great Horned Owl 2

We also talked about the Barn Owl and the Pygmy Owl. Charles came to our class again and showed us what all of these owls looked like AND sounded like! The kids loved it and learned lots of fun facts.

At the end of our unit the kids got to pick their favorite owl to make with whatever materials they wanted. Lots of them painted, some used markers and some used construction paper. They made sure to make them look like the real owls would look!

owls painted

big owls